
How to add a glossary entry
Glossary entries help you standardize terminology across your documentation. By creating consistent terms and definitions, you ensure that AI-generated content always uses your preferred naming conventions—for example, keeping your brand name in the correct format throughout all articles.


Adding a new glossary entry
-
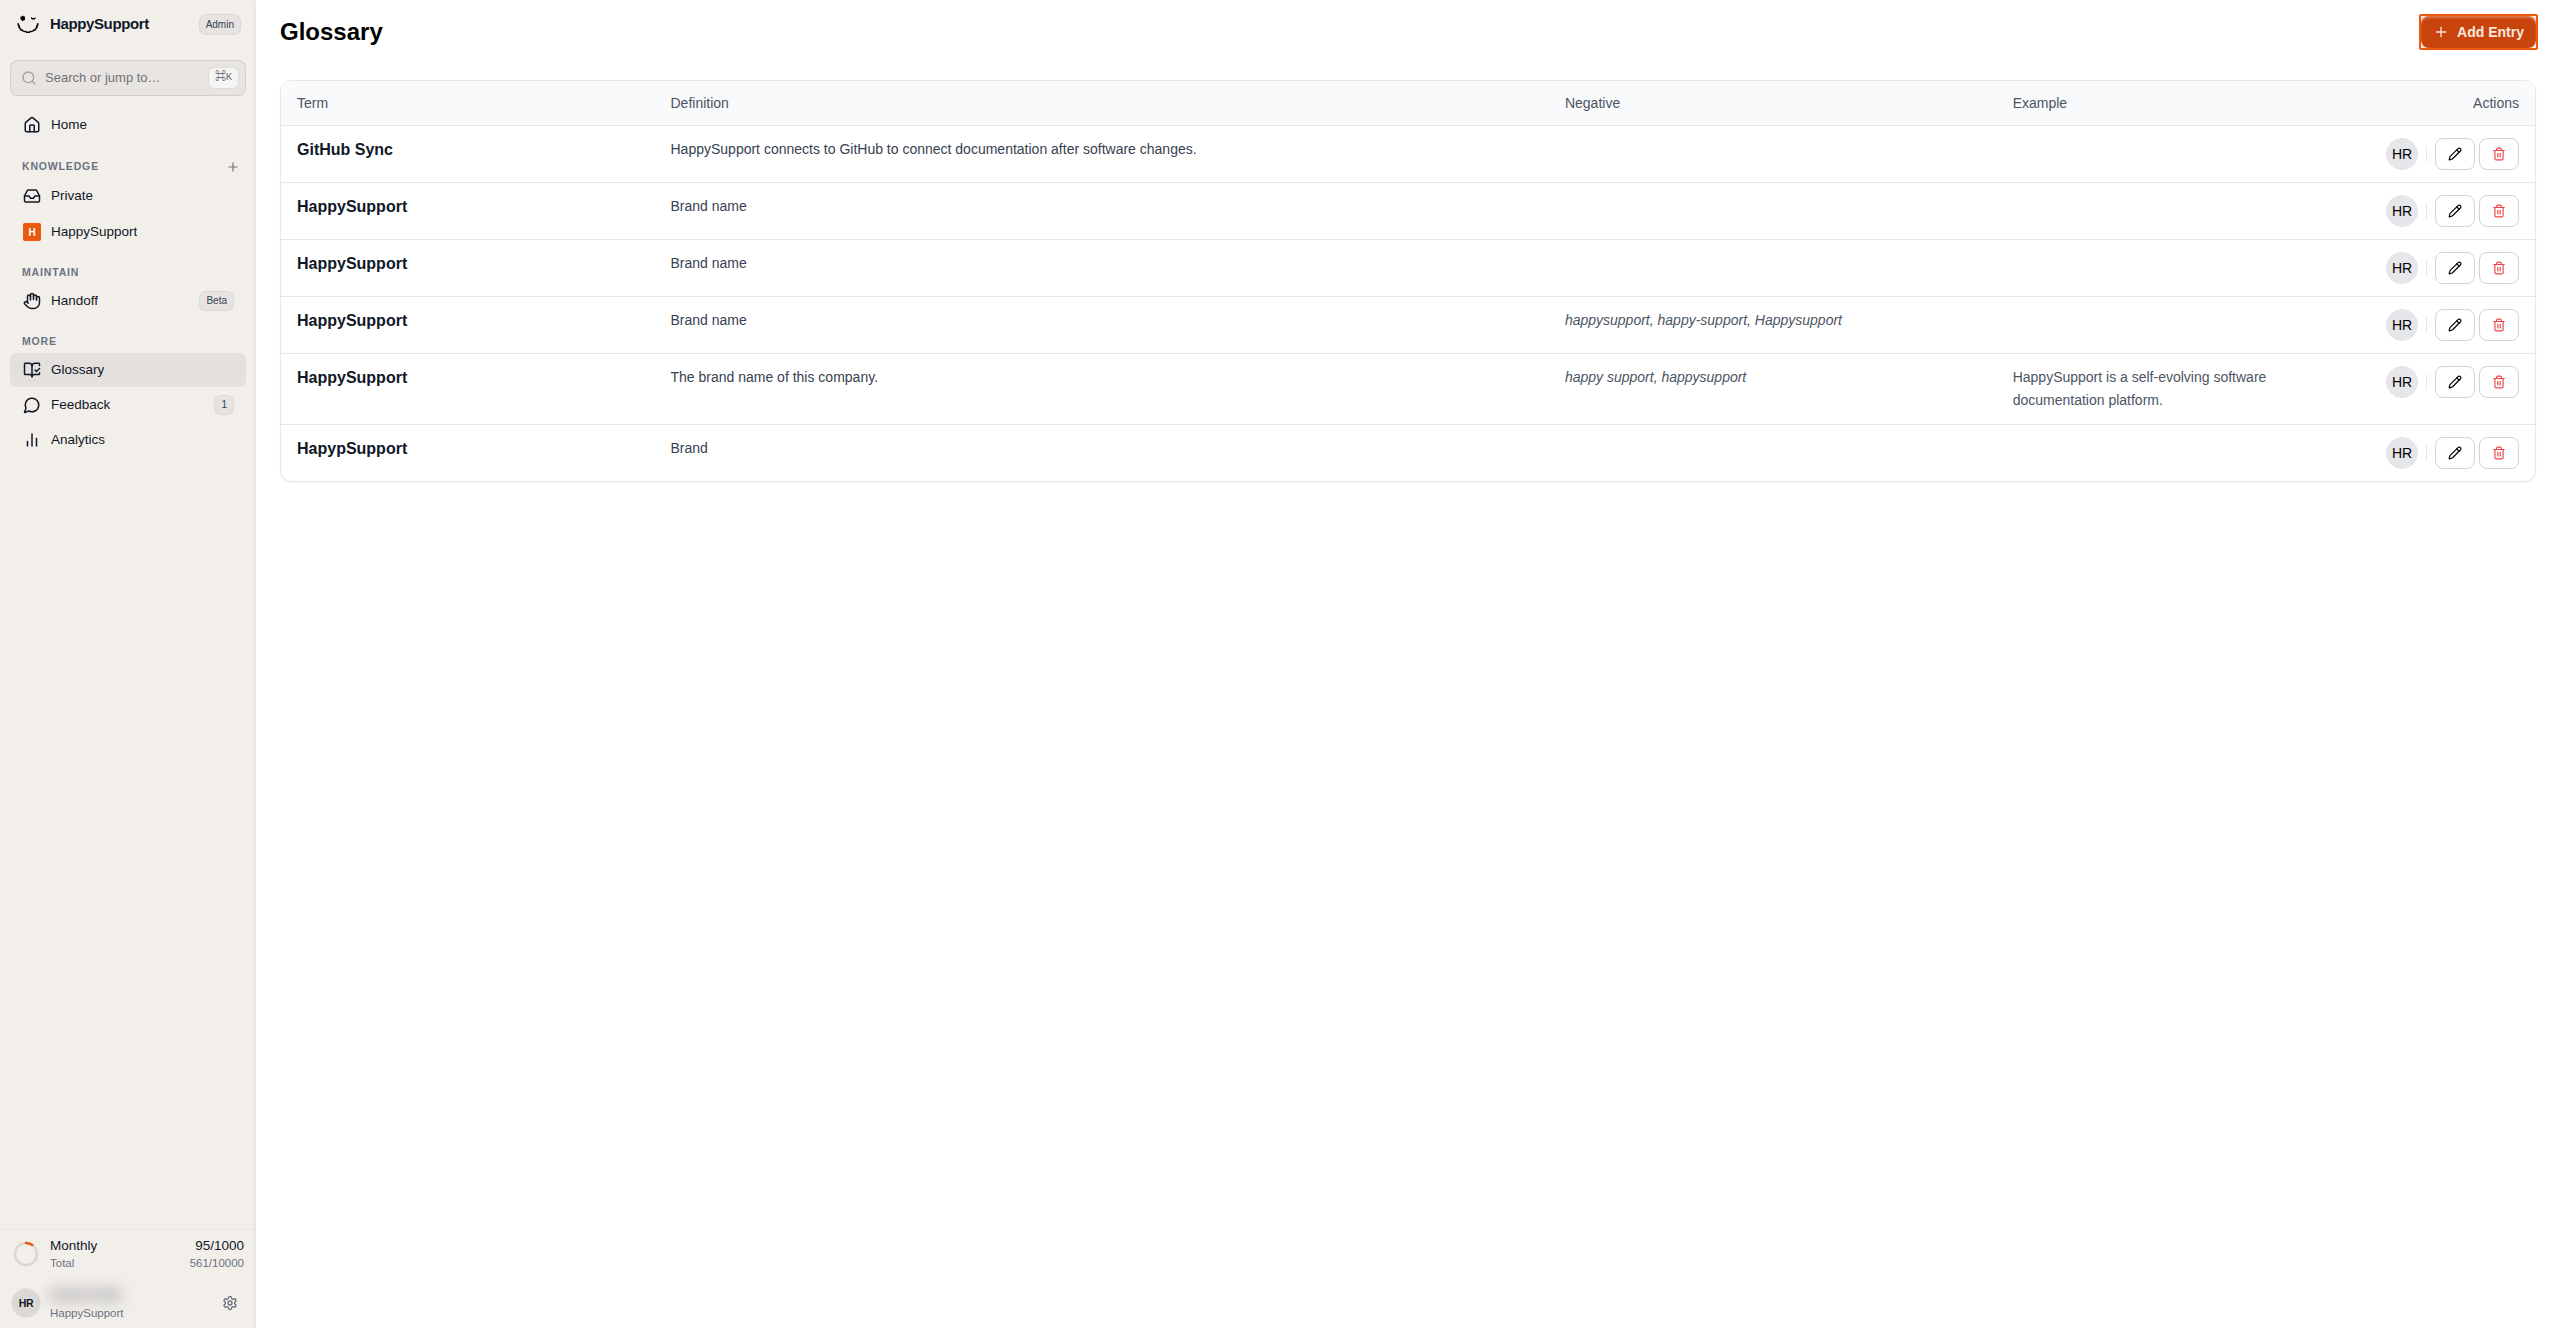
Open the Glossary section
In the left sidebar navigation, locate the MORE section and click on Glossary. This opens the glossary management page where you can view and manage all your terminology entries. -
Start creating a new entry
Click the Add Entry button in the top-right corner of the Glossary page. This opens the "Add New Glossary Item" modal.

-
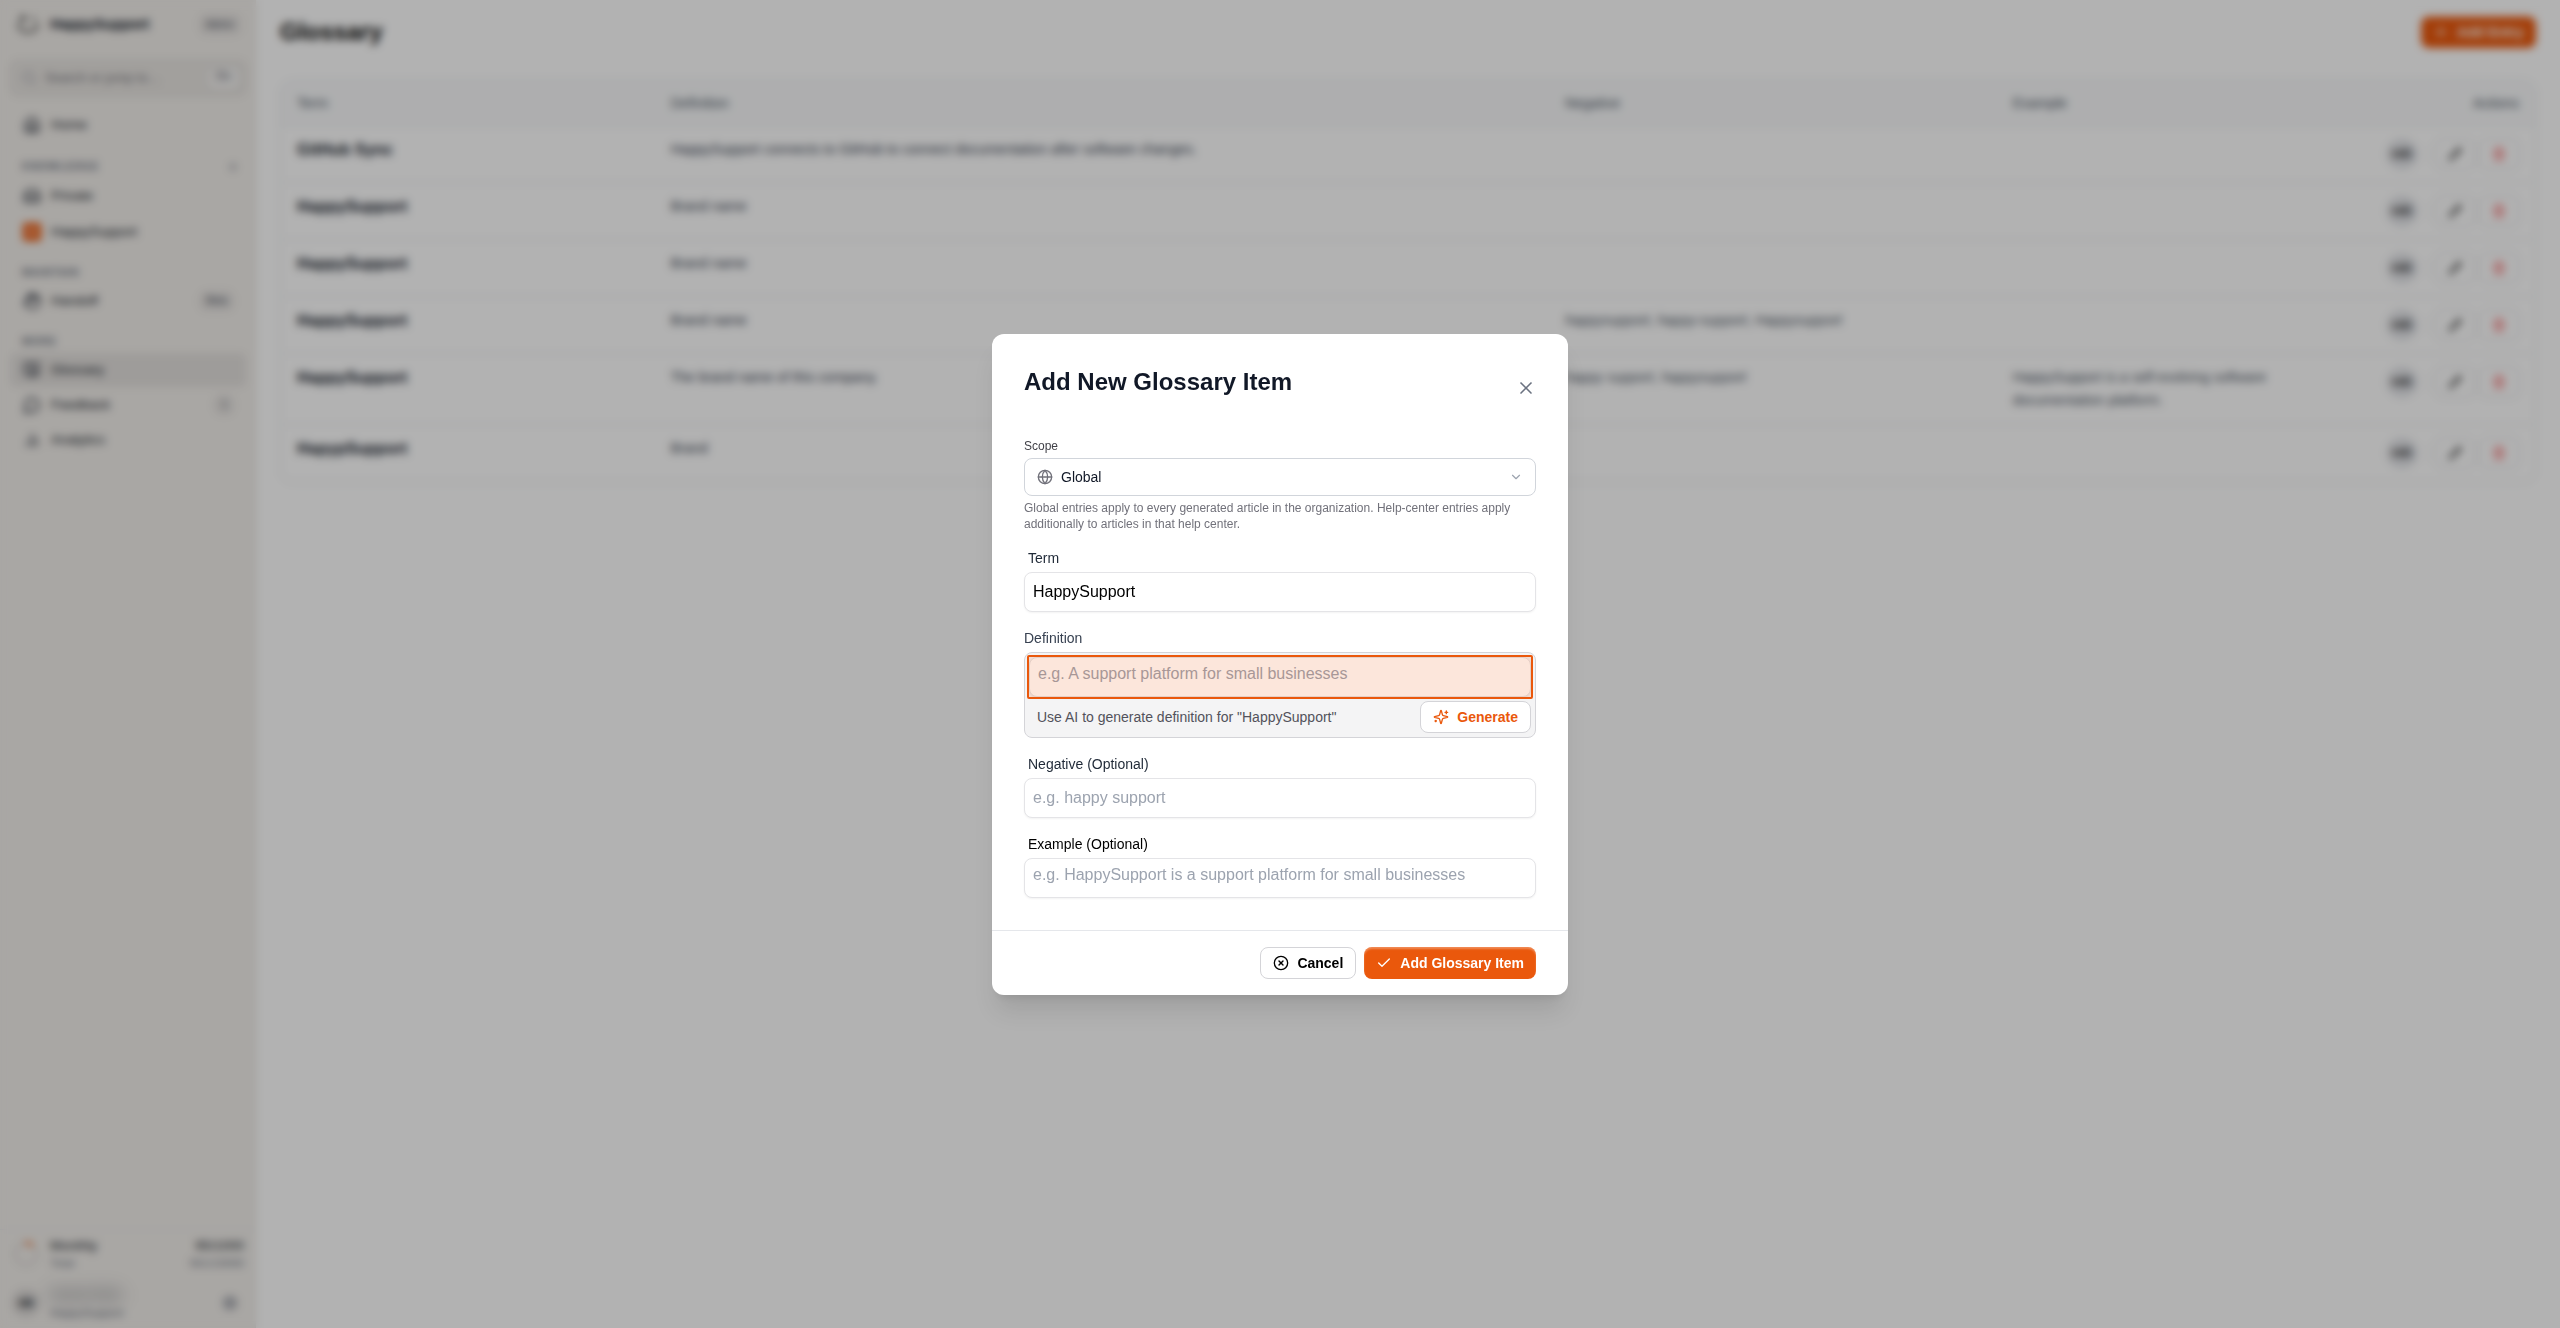
Fill in the glossary details
Complete the form with your term information:-
Scope: Select the scope from the dropdown. "Global" applies the entry to all generated articles across your organization.
-
Term: Enter the term you want

to standardize (e.g., your brand name like "HappySupport").
-
Definition: Click the Definition field and describe what the term means or how it should be used (e.g., "Brand name").
-
Negative (Optional): Add any incorrect variations to avoid.
-
Example (Optional): Provide usage examples if needed.

-
-
Save your glossary entry
Click the Add Glossary Item button at the bottom right of the modal to create your new entry.
Your new glossary entry is now active and will help ensure consistent terminology when AI generates documentation for your Help Center.