
How to use the help article editor
Create and publish Help Center articles using the multi-pane editor with formatting toolbar, navigation panel, and settings.
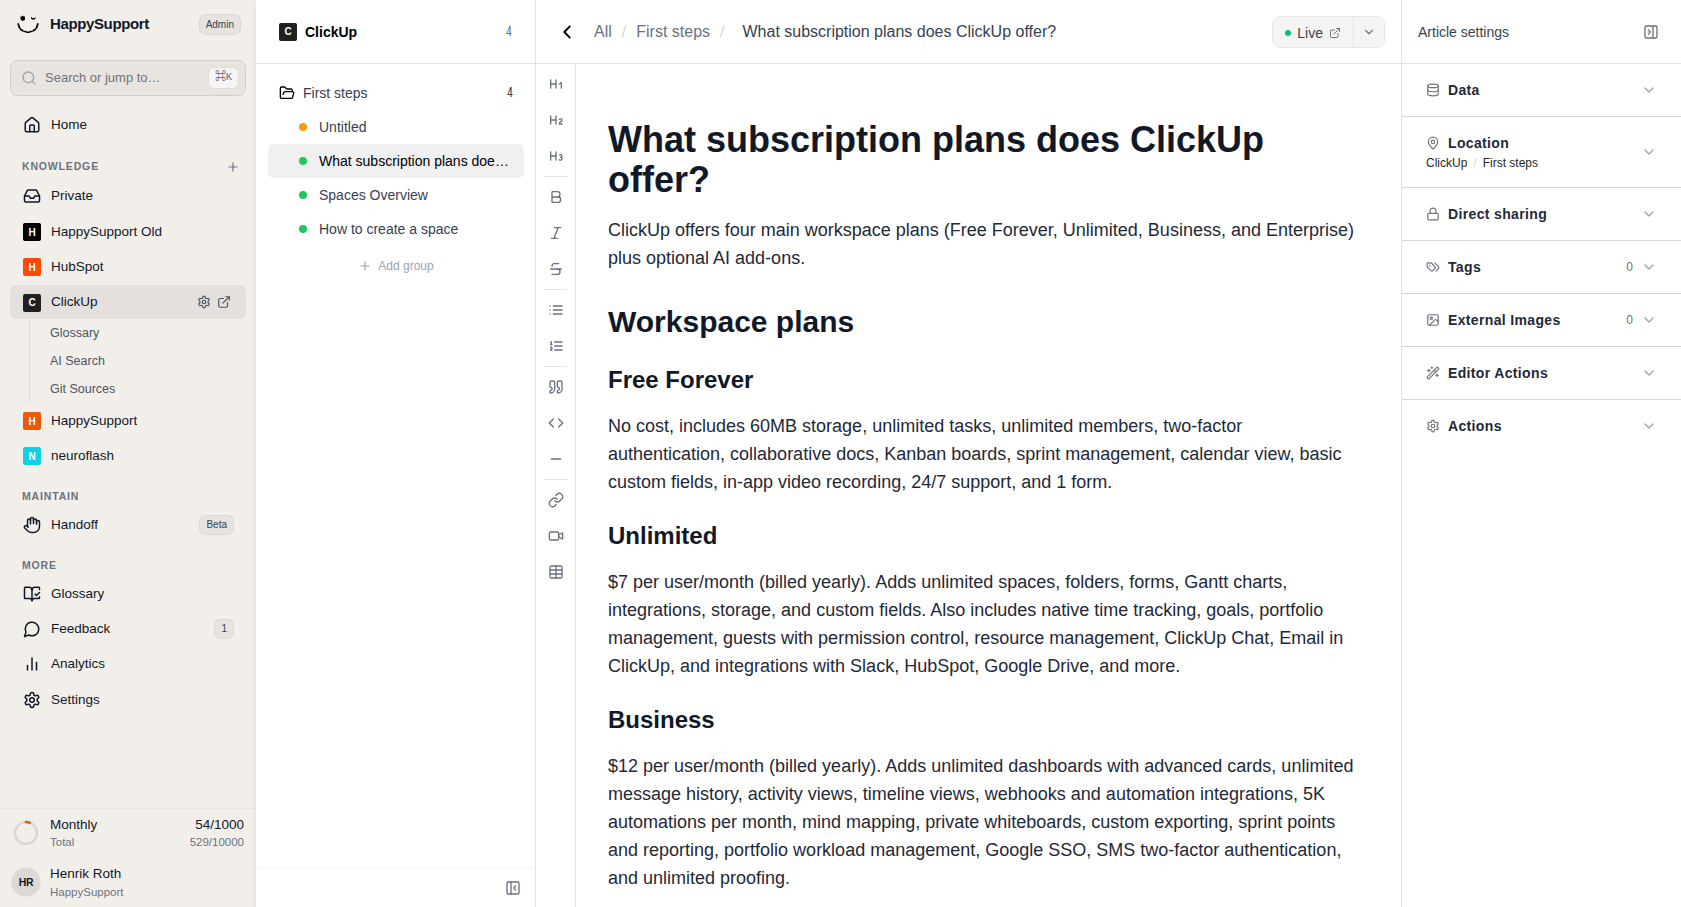
The help article editor is a multi-pane workspace where you create, organize, and publish Help Center content.

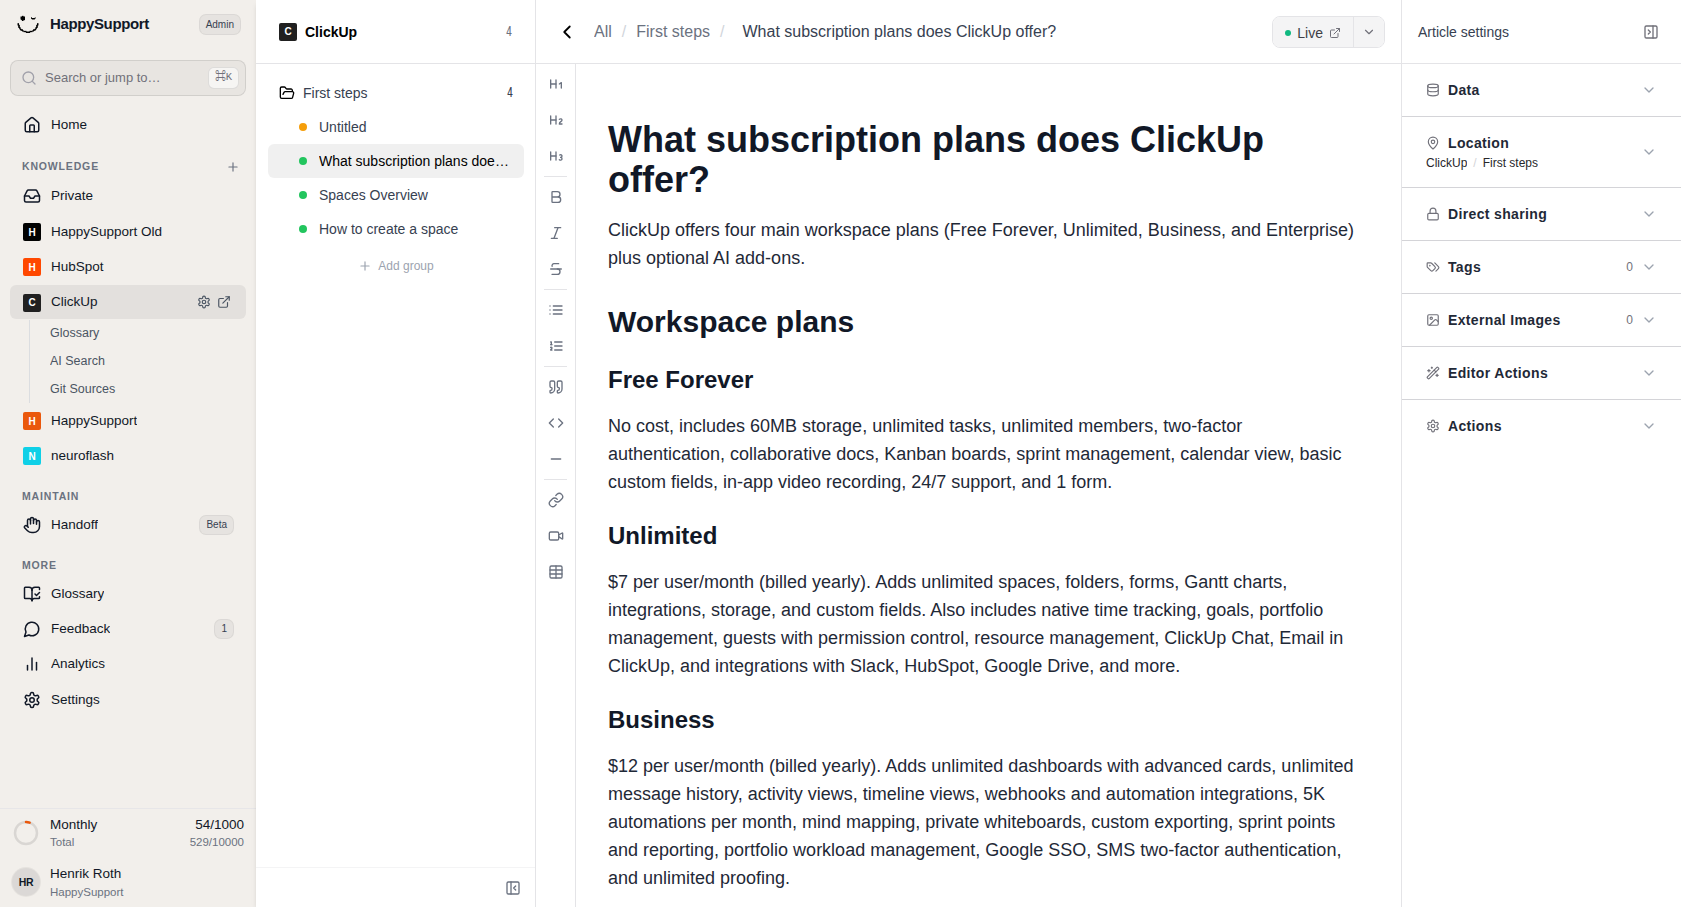
Header bar
The header bar sits at the top of the editor and provides context and publishing controls.
Breadcrumb navigation: Shows the current path (e.g., "All / First steps / What subscription plans does ClickUp offer?"). You can use this to understand where the article sits in your Help Center hierarchy.
Publication status: A status pill on the right displays the current state, such as "Live" with a green dot. Click the dropdown arrow to access additional status or sharing options.
Article navigation panel
This narrow panel between the global sidebar and the editor displays the content structure for your selected Help Center.
Folders and groups: Sections like "First steps" appear as collapsible folders with a count of contained articles. You can expand or collapse these to browse your content tree.
Article list: Each article entry shows a colored status dot: green for live articles, grey for internal articles, and orange for drafts. Click any entry to open it in the editor.
Add group: At the bottom, use "+ Add group" to create new subgroups within your collection.
Formatting toolbar
A slim vertical toolbar runs along the left edge of the content editor.
Heading levels: Quick buttons for H1, H2, and H3 let you insert or convert text to different heading styles.
Text formatting: Icons for bold, italic, lists, quotes, dividers, links, and embeds allow you to style content or add structured blocks without leaving the editor.
Content editor
The central canvas is where you write and edit your article.
Title field: A large bold heading at the top serves as your article title.
Body area: Below the title, you can add introductory text, section headings, and paragraph content. The editor supports rich text with clean typography for easy readability.
When you hover over an embedded step image, an "Auto-zoom" toggle appears. This toggle controls whether readers can see the full or only the relevant part of an image. It's enabled by default. For detailed editing steps, see How to edit an article after recording.
Article settings
The right-side panel labeled "Article settings" contains collapsible sections for managing metadata and configuration.
Data: Access structured data fields associated with the article.
Location: Displays the current path (e.g., "ClickUp / First steps") and lets you move the article within your Help Center.
Direct sharing: Configure sharing permissions or generate direct links.
Tags: Assign tags to categorize content; the count shows how many are currently applied.
SEO: Manage the article's meta description for search engines.
External Images: Manage images linked from external sources.
Editor Actions: Access editing tools or automation options.
Actions: Perform article-level operations like duplication or deletion.
SEO
The SEO section lets you control the meta description that appears in search engine results for your article. You can edit the description inline, and a character counter helps you stay within the recommended 160-character limit.
If you do not have a meta description set, we'll automatically create one for you. You can also use the AI to create a new description on demand. Both automatic generation and regeneration follow the formality and addressing style configured for your Help Center.
 Powered by happysupport.ai